Garbedge Designs

Garbedge Designs
Showing posts with label sewing. Show all posts

Friday, October 25, 2019

Visits from the ghost of Garbedge Past

Some Favorite Projects From the Past Couple Years

In no particular order, here they come.

1. 

The (Repurposed) Strapless Lolita Dress


This is the second version of this dress that I made after designing it with the help of a vintage slip from the 50s. 

The material I used came from a very old LLBeans night gown.

2.

The (Silk) Strapless Lolita Dress


This was the first version of this dress I made. 
The silk came from Katz Exclusive Fabrics in Borough Park.. 

3.

High Waisted Floral Shorts


Love those matte black tack buttons <3
Back welt pockets.
Wide waistband giving them a higher rise. 

Made from Rag & Bone denim purchased at Mood Fabrics in Manhattan.

4.

Scalloped Tee


I was a little wary of scalloping with a knit fabric, but turns, it's nothing to be afraid of.

5.

Honey Bee Jacket

This might be my favorite creation from the past couple of years. 
It certainly gets a lot of use.


And peek-a-boo! A honey bee bedazzled back!

6.

Pressed Wool Vest

This was a project I did entirely with old hoarded fabrics I've been needing to get rid of (by using) for a long time. 


This too gets a lot of wear.


7.

Bikini

I believe I found the material for this at Stretch House in NYC's garment district.
It turns an even prettier color when wet!


Just look at how much I loved this beauty.


8.
Denim Vest


This is the same denim vest I've been selling for years, but this one in particular stood out to me as having expert craftsmanship. 


9.

Gathered Jacket

This is a newly minted jacket and I love it so. Made from a beautiful gray silk and lined with Carhartt quilted lining. 


10.

Owl Undies


Let's get a closer look.


'Nuff said.


Friday, August 12, 2016

Scalloping Tutorial

Getting the Perfect Scallop

DIY Scalloping Tutorial With Pictures!


Here's what you'll need:

-A curved metal ruler OR something rounded to trace
-Chalk pen OR fabric marker
-Small detailing scissors
-Seam ripper
-Non-stretch fabric
-Steam iron
-Sewing machine


I have found that the absolute key to creating even and smoothly rounded scalloping is a metal Varied Curve Form ruler, or a metal French Curve. Plastic is not as helpful because you can't press them--something I will explain later. This is not a crucial tool, but I highly recommend it, especially for the perfectionists among us.

If you do not have one of these rulers, find a traceable object that has the size curve you desire. Spools of thread, mugs, bowls, and jars all work well for tracing. 

First, MAKE A PLAN.
When deciding what size scallop you'd like to create, be sure to measure the distance you'll be scalloping so that the scallops fit exactly into the desired space, and you don't end up with a half scallop, or a tiny scallop, at the end. Then use your ruler to trace a row of even curves along the edge of the fabric you would like to scallop. Your chalk marks should be on the wrong side of your material, and your fabric should be folded right sides together. For the purposes of this post I'm going to assuming we are scalloping a hem, though neck lines and cut-outs look gorgeous scalloped as well. 


The smaller scallops you choose, the more difficult they will be to execute, to keep curved, and to keep even. Mark the intersection of each curve. This must be at least 1 inch below the edge of your fabric, or else your scallops won't be connected. 


Next, you want to stitch along you chalked line using a straight and short stitch.
Do not stitch above the marked intersections. 

When sewing scallops and other small curves--such a pater-pan collar--you want to shorten your stitch length. I generally use a length of 0.5, but you may want to adjust this depending on what fabric you are using. As you sew, be sure you are pivoting at the point where each curve intersects. With your needle in the down position (so it will hold your project in place and keep your line of stitching unbroken) lift your presser foot and rotate the fabric in order to follow your chalked line. Put the presser foot back down and sew the next curve, repeating the pivot at every intersection. 


Now snip the excess fabric. Cut about 1/4" below stitching.


Finally, make a tiny little snip directly at the crest of the point, creating a notch when the fabric is splayed. Be sure not to snip you seam. Also notch around the seam allowance of each curve. This allows the scallop to lay flat when turned right-side-out. Because the curve around the seam allowance contains more fabric than the curve of the the stitching, without the notches the seam allowance will be forced to bunch in order to fit into the curve of the stitches. This would cause bumps and small flat areas in your scallops.


Next, turn all of your scallops right side out. You'll end up with a somewhat messy looking string of scallops that looks something like this:


Now begins the finicky annoying part that is infinitely helped by your metal ruler: Flattening your scallops exactly on the seam. 

UGH.


Begin by making sure each crest is fully turned out. Here is where my technique deviates from others'. If I have trouble turning out a certain corner, I take my seam ripper and rip out one single stitch around the crest of the intersection (the spot where you pivoted). As you attempt to turn your scallops, you will be able to see which stitches are preventing the fabric from laying flat. That's the one you want to rip out. This instantly allows the crest to lay flat when turned out. KEEP IN MIND that if you use this technique, you must top stitch your scallops to finish your project, otherwise your seam may pull out.

Here is a scallop that needs to be seam ripped:


Here is a scallop that is laying flat:


Now take your curved ruler and use it to push the curve out evenly. Use a steam iron to press flat while the ruler is still in the scallop. 


Lastly, top stitch the edge of your scalloping using a straight, normal length stitch.


In the end, you should have beautiful & smooth scalloping.


Forever yours with pricked fingers and pins in her mouth,
Kelsey

Monday, August 8, 2016

Artists & Fleas Preparation: Part One of Many

Getting ready for...

The Williamsburg Artists & Fleas Market


I spent the non-procrastinating part of my day sewing two of these zip up hoodies. And now that my eyes grow weary I am back to the procrastination game, though I had plans to sew some orders before bed.


Bed is imminent and Monday is almost over, but with the help of my precious pattern binder I did at least get something done.


The hoodie is made from a heavy gray knit that I've been saving for the right project. I lined the hood with this beautiful calico from the Buttercream collection. I found it at the Jo-Anne's in Portland, and since I am ever the sucker for florals, I bought a few yards in a couple of colors. 


My plan is to make a full size run of these hoodies, with a variety of the floral fabrics lining the hoods. So far I've just used the gray and pink one, and I am 100% into the result. 


I ordered 10 22" zippers from Wawak.
I have plenty of florals, plenty of sweatshirt fleece. 
Nickel rivets.


Ready, set, sew!

Or maybe, ready, set, snooze. 
Until tomorrow at least.


Friday, July 8, 2016

Thrifting a New Etsy Listing


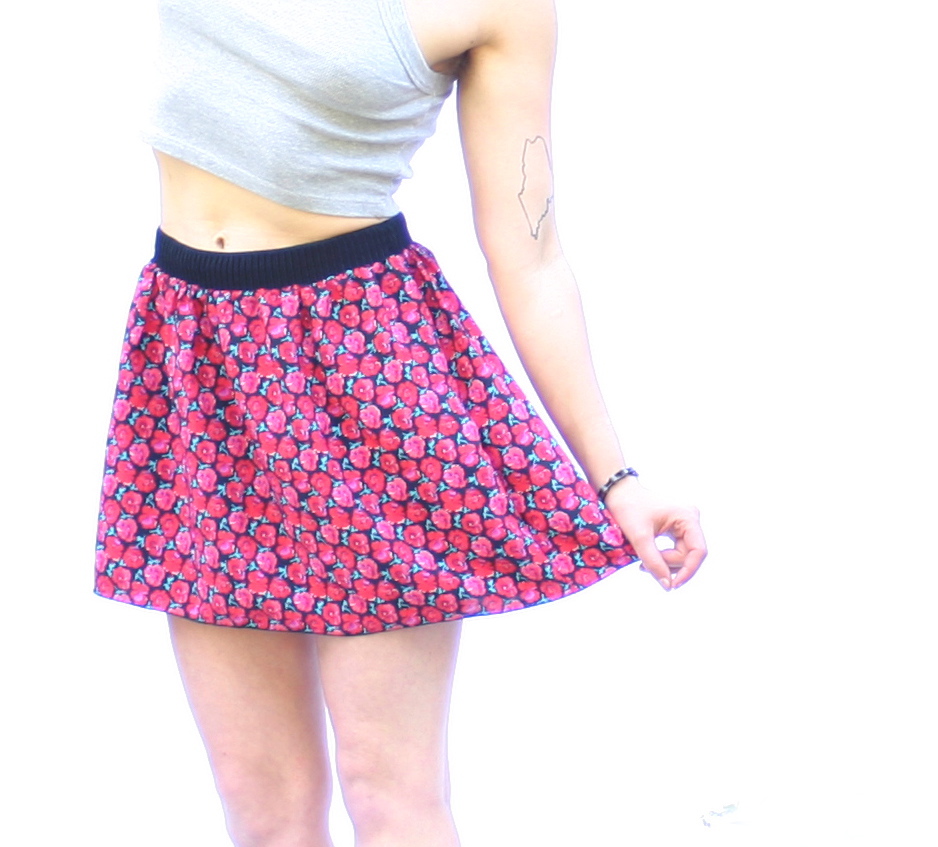
 I scored this pretty pink floral material at a thrift store a few months ago. It was the first time I'd been into Threads of Hope, and they had some siqq shit for a fabric hungry seamstress.  What better way to kill the 15 minutes I had before my psychiatry appointment? If I can't have NYC's Garment District at my finger tips anymore, at least I can thrift me some good textiles here and there.


 The floral is slinky and hard to keep folded, which, as any good textile hoarder knows is the most obnoxious quality a fabric can have. After it slithered off my fabric shelf and onto the floor for just about the millionth time I decided it was time to get it off my shelf. 


I had been desperately wanting to put a few new summer designs in my Etsy shop, so I made this flouncy little number. (Skirt is available here in sizes XS-3XL). 


Gathered. Elastic waistband. Lightweight. Slinky. Rolled hem. 


I'm keeping one for myself, because this is going to be the summer of wearing things I don't usually wear. This means, I'm coming for you, dresses! I'm coming for you skirts and above all, I'm coming for you, not-wearing-the-same-thing-everyday. Summer is busy for me, and Garbedge Clothes is seriously still lacking in debuting summer items. So here. Here is a very simple summery skirt that I made just for you (anybody, really). But mostly just for you. 

BUY THIS BABY BEFORE THEY ARE GONE!

 I only have enough fabric for 2-4 more skirts, depending on what size(s) people order.

Monday, December 29, 2014

The Dora Shirt


Ahh, this button-down is a favorite baby in my shop. The  beige silk came from B&J Fabric in NYC's garment district. It's one of my favorite places to browse, particularly for denim, but the place is pretty pricey and not for the faint of wallet. I had the buttons covered at a little place on 36th and the floral silk for the collar came from Mood. Sometimes I have meltdowns in mood, due to the overwhelming nature of choice.


I designed her from this little room I was subletting in Prospect Heights last summer. 

That room was my first taste of having a real WINDOW in two years; my first taste of my own room in two years; first taste of privacy and a view and floorspace to cut on.


Damn, was it happy-making.